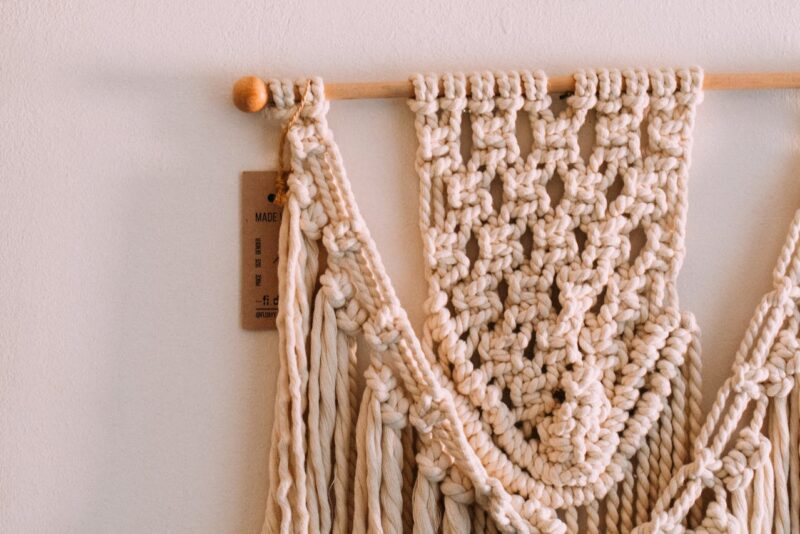
Macrame wall hangings have become increasingly popular in recent years, adding a touch of bohemian charm to any space. The intricate knots and patterns create a stunning visual display that can transform a plain wall into a focal point. The best part? You can easily make your own macrame wall hanging with just a few materials and some patience. In this DIY guide, we’ll walk you through the steps to create your very own macrame masterpiece.

Materials
Before we dive into the process, let’s gather the materials you’ll need:
- Macrame cord or rope
- Wooden dowel or branch
- Scissors
- Tape measure
- Optional: beads or other decorative elements
Step 1: Measure and Cut
Start by cutting several lengths of macrame cord, each measuring around 8-10 feet. The number of cords you’ll need depends on the size and design of your wall hanging. For a simple beginner project, 8-10 cords should suffice.
- Before you start making your macrame wall hanging, you need to measure and cut your cords according to the size and design of your project. You can use a tape measure or a ruler to measure the length of each cord and a pair of sharp scissors to cut them.
- The length of your cords will depend on how big you want your wall hanging to be and how many knots you plan to make. A general rule of thumb is to multiply the desired length of your finished wall hanging by four to get the length of each cord. For example, if you want your wall hanging to be 50 cm long, you need to cut each cord to 200 cm long.
- You also need to consider the thickness and type of your cords when measuring and cutting them. Thicker cords will require more length than thinner cords, as they will take up more space when knotted. Braided or twisted cords will also shrink more than single-strand cords, as they will unravel slightly when knotted.
- To cut your cords, you can use a cutting mat or cardboard to protect your surface. You can also use a masking tape or a binder clip to secure the end of your cord to your surface, so it doesn’t move while you cut. You can also use a marker or a pin to mark the length of each cord, so you can cut them evenly. Make sure to cut your cords slightly longer than the calculated length, as you can always trim the excess later.
Step 2: Attach to the Dowel
Take one of the cords and fold it in half. Place the folded end over the dowel, creating a loop. Pull the loose ends of the cord through the loop and tighten, securing it to the dowel. Repeat this step with the remaining cords, spacing them out evenly along the dowel.
Step 3: Start Knotting
Now it’s time to start knotting! The most basic knot used in macrame is the square knot. To create a square knot, take two adjacent cords and cross the left cord over the right cord. Then, bring the right cord under the left cord and through the loop created. Pull both cords tight to complete the knot. Repeat this process with the next set of cords.
Step 4: Experiment with Patterns
Once you’ve mastered the square knot, you can start experimenting with different patterns and designs. Try alternating square knots with half-square knots or using different combinations of cords. Get creative and let your imagination run wild!
Step 5: Add Decorative Elements
If you want to add some extra flair to your wall hanging, consider incorporating beads or other decorative elements. Simply thread them onto the cords before tying the knots. Beads can add a pop of colour or create interesting textures within your design.
Step 6: Finishing Touches
Once you’re satisfied with the length and design of your macrame wall hanging, it’s time to add the finishing touches. Trim the excess cord at the bottom to create a clean, even fringe. You can also trim the cords at different lengths for a more dynamic look.
- After you have finished knotting your macrame wall hanging, you need to add some finishing touches to make it look more polished and professional. The finishing touches include trimming the ends of your cords, combing or fraying the fringe, and adding some embellishments or accessories to your wall hanging.
- To trim the ends of your cords, you can use a pair of sharp scissors or a rotary cutter to cut them evenly and neatly. You can also experiment with different shapes and styles, such as straight, diagonal, inverted V, or scalloped. You can also leave some cords longer than others to create some contrast and interest.
- To comb or fray the fringe, you can use a fine-tooth comb, a pet brush, or a wire brush to gently brush the ends of your cords until they are fluffy and soft. You can also use your fingers to separate the strands and create a more natural look. This will give your wall hanging more texture and volume.
- To add some embellishments or accessories to your wall hanging, you can use beads, feathers, shells, crystals, or any other items that match your style and theme. You can also use some paint, dye, or embroidery to add some colour or patterns to your wall hanging. You can also use some hooks, clips, or rings to hang your wall hanging on your wall.
Step 7: Hang and Enjoy
Finally, find the perfect spot to hang your macrame wall and step back to admire your handiwork. Whether it’s in the living room, bedroom, or even a cosy nook, your DIY creation is sure to be a conversation starter.
Conclusion
Creating your own macrame wall hanging is not only a fun and fulfilling DIY project but also a great way to personalize your home decor. With just a few simple materials and some patience, you can craft a beautiful piece of art that reflects your unique style. So, why not give it a try? Get creative, experiment with different knots and patterns, and let your imagination soar!
FAQs
Macrame is a textile art form that involves knotting cords or strings to create decorative patterns. It’s often used to make wall hangings, plant hangers, and other home decor items. In the context of wall hangings, Macrame allows you to create intricate designs using various knots.
Is Macrame Difficult for Beginners?
Not at all! Macrame is beginner-friendly. You only need to learn a few basic knots to get started. Common knots include the Lark’s Head Knot, Square Knot, and Double Half Hitch Knot. Once you grasp these, you can create beautiful wall hangings.
For a simple Macrame wall hanging, you’ll need:
Macrame Cord: Choose 3-ply or braided cords for larger pieces.
Dowel or Stick: Use a wooden dowel, driftwood, or even a plain stick as the base.
Scissors: A good pair of sharp scissors.
Tape Measure: To ensure accurate lengths.
There are plenty of online resources! YouTube hosts numerous step-by-step Macrame tutorials. Some popular channels include:
Soulful Notions: Their Easy Beginner Macrame Wall Hanging Tutorial is great for beginners.
XO, MaCenna: Check out their beautiful and easy-to-do Macrame wall-hanging tutorial.
Made by Hand: They offer a beginner-friendly mini Macrame wall hanging tutorial.
Absolutely! The sky’s the limit. You can experiment with different knots, patterns, and variations. Whether you want a minimalist design or a layered masterpiece, Macrame allows for endless creativity.


15 comments
Hey there, You have done an incredible job. I will
definitely digg it and personally recommend
to my friends. I am sure they will be benefited from this site.
Everyone loves it whenever people come together and share opinions.
Great site, stick with it!
You ought to be a part of a contest for one of the best websites
on the internet. I am going to recommend this blog!
Please let me know if you’re looking for a article writer for your blog.
You have some really great posts and I feel I would be
a good asset. If you ever want to take some of the load off, I’d really like to write some material for your blog in exchange
for a link back to mine. Please send me an e-mail if interested.
Thank you!
I’m truly enjoying the design and layout of your site.
It’s a very easy on the eyes which makes it much more pleasant for me to come here and visit more often. Did you hire out
a developer to create your theme? Exceptional work!
What’s up, I read your blog regularly. Your humoristic
style is awesome, keep up the good work!
I am sure this piece of writing has touched all the internet visitors,
its really really nice article on building up new
weblog.
This website was… how do I say it? Relevant!!
Finally I’ve found something that helped me. Kudos!
Hi there, I enjoy reading all of your article post. I wanted to write a little
comment to support you.
Hi there to all, for the reason that I am
genuinely keen of reading this webpage’s post to be updated daily.
It carries nice stuff.
I think that is one of the most important info for me.
And i am satisfied studying your article. But want to observation on some general issues, The website taste is wonderful,
the articles is actually great : D. Just right process, cheers
You really make it seem really easy along with your presentation however I find this matter
to be really something that I think I would by no means understand.
It sort of feels too complex and extremely
huge for me. I’m looking forward in your next post, I will attempt to get the hang of it!
Pretty section of content. I just stumbled upon your weblog and in accession capital
to assert that I get in fact enjoyed account your blog posts.
Any way I will be subscribing to your feeds and even I achievement you access consistently quickly.
I used to be suggested this web site by way of my cousin. I am not positive
whether this put up is written by him as nobody else recognize such specified approximately my
difficulty. You’re wonderful! Thank you!
Undeniably believe that which you stated. Your favorite reason appeared to be on the web the easiest
thing to be aware of. I say to you, I definitely get annoyed while people think about worries that they plainly don’t know about.
You managed to hit the nail upon the top as well as defined
out the whole thing without having side effect , people can take a signal.
Will probably be back to get more. Thanks