Having a gas burner that won’t light up can be frustrating, especially when you’re in the middle of cooking a delicious meal. But don’t worry, you don’t always need to call a professional for every little issue around the house. With a bit of troubleshooting and some simple fixes, you can save yourself some money and get your gas burner up and running again in no time.

1. Check the Gas Supply
The first thing you want to do is make sure that your gas supply is turned on. It may sound obvious, but sometimes the gas valve can accidentally get turned off, causing your burner to not light. Locate the gas valve, usually located behind the stove, and check if it’s in the “on” position. If it’s off, simply turn it back on and try lighting the burner again.
One of the possible reasons why your gas burner won’t light is that there is no gas supply to the appliance. This can happen due to a variety of factors, such as:
- A gas outage in your area
- A closed or faulty gas valve
- A kinked or damaged gas line
- A clogged or dirty gas orifice
To check the gas supply, you can try some of these tips:
- Contact your gas company or check their website to see if there is a gas outage in your area. If there is, wait until the service is restored and try to light the burner again.
- Locate the gas valve behind or under the appliance and make sure it is fully open. You can also try to turn it off and on again to reset it. If the valve is stuck or broken, you may need to replace it.
- Inspect the gas line that connects the appliance to the gas valve and make sure it is not kinked, twisted, or damaged. If it is, you may need to straighten it or replace it.
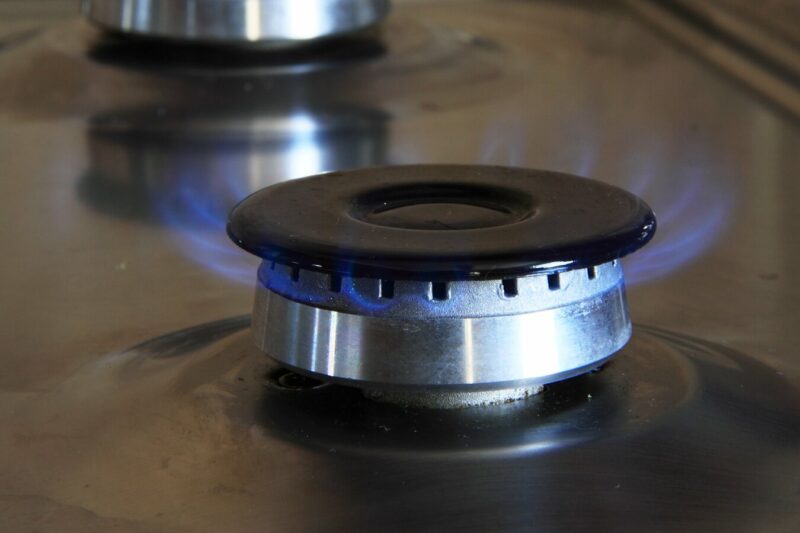
- Remove the burner cap and the burner head and look for the gas orifice, which is a small hole that allows gas to flow to the burner. Use a thin wire or a needle to gently poke the orifice and clear any dirt or debris that may be blocking it. You can also use a soft brush and a mild detergent to clean the orifice and the burner head.
By checking the gas supply, you can troubleshoot and fix one of the common causes of a gas burner that won’t light.
2. Clean the Burner
Over time, gas burners can accumulate grease and food debris, which can clog the burner ports and prevent it from lighting properly. To clean the burner, start by removing the grates and burner caps. Soak them in warm, soapy water and scrub away any built-up grime with a soft brush. Use a toothpick or a straightened paperclip to gently clean out the burner ports, making sure they’re free from any obstructions.
3. Check the Igniter
If your gas burner has an electronic igniter, it’s possible that it may have become dirty or worn out. Inspect the igniter for any signs of damage or corrosion. If it looks dirty, gently clean it with a soft cloth or a cotton swab dipped in rubbing alcohol. If the igniter is damaged, you may need to replace it. Consult your appliance’s manual or contact the manufacturer for specific instructions on how to replace the igniter.
4. Adjust the Burner Cap

Sometimes, a misaligned burner cap can prevent the gas from flowing properly, leading to ignition issues. Make sure the burner cap is properly aligned and sitting flat on the burner base. If it’s not, adjust it until it sits securely in place. This simple adjustment can often solve the problem and get your burner working again.
5. Check the Gas Tubes
If none of the previous steps have resolved the issue, it’s possible that there may be a problem with the gas tubes. Carefully inspect the tubes for any signs of damage, such as cracks or kinks. If you notice any damage, it’s best to call a professional to repair or replace the gas tubes, as this requires specialized knowledge and tools.
To check the gas tubes, you can try some of these tips:
- Turn off the gas supply and disconnect the power to the appliance. Wait for the appliance to cool down completely before working on it.
- Locate the gas tubes behind or under the appliance. They are usually made of metal or rubber and have fittings or clamps on both ends.
- Inspect the gas tubes for any signs of wear, tear, corrosion, or damage. If they are cracked, split, or punctured, you may need to replace them.
- Check the fittings or clamps on the gas tubes and make sure they are tight and secure. If they are loose or missing, you may need to tighten or replace them.
- Align the gas tubes properly with the gas valve and the burner. Make sure they are not kinked, twisted, or bent. If they are, you may need to straighten or adjust them.
- Turn on the gas supply and the power to the appliance. Try to light the burner and check for any gas leaks. You can use a soap and water solution or a gas leak detector to test for leaks. If you smell gas or hear a hissing sound, turn off the gas and the power immediately and contact a professional.
6. Call a Professional
If you’ve tried all the above steps and your gas burner still won’t light, it’s time to call in the experts. Sometimes, there may be underlying issues that require professional attention. A qualified technician will be able to diagnose the problem accurately and provide the necessary repairs to get your gas burner working again.
Remember, safety should always be your number one priority when dealing with gas appliances. If you ever smell gas or suspect a gas leak, immediately turn off the gas supply, open windows for ventilation, and leave the area. Contact your gas provider or a professional technician to assess and fix the issue.
By following these simple troubleshooting steps, you can often fix a gas burner that won’t light on your own and save yourself the cost of a professional repair. So the next time you encounter this issue, don’t panic—grab your toolkit and give it a try!
Conclusion
Provides practical and straightforward solutions for a common household issue. It emphasizes the importance of checking the gas supply, ensuring proper alignment and cleanliness of the burner parts, and the role of a spark in igniting the burner. The article serves as a helpful guide for those looking to resolve their gas burner problems quickly and safely, highlighting that sometimes a simple cleaning or adjustment is all that’s needed to get things working again. However, it also wisely advises when to seek professional help, ensuring that safety is always the top priority. Remember, if you smell gas or suspect a leak, it’s crucial to act immediately and call the experts.
Frequently Asked Questions
Check to ensure that your gas supply is turned on. Sometimes the gas valve can be accidentally turned off, which would prevent the burner from lighting.
Remove the burner cap and use a toothbrush, warm soapy water, and a needle or fine wire to clean the burner ports and the ignition port. This can help remove any blockages that might be preventing the burner from lighting.
If there’s no spark, you should check the power supply to your stove and make sure it’s plugged in. Clean the white porcelain igniter and the metal burner cap with a cotton swab soaked in alcohol. If there’s still no spark, a more thorough cleaning of the metal burner head parts may be necessary.
Make sure the burner cap is correctly placed and level on the burner head. A misaligned burner cap can prevent the burner from lighting properly.
If you’ve tried the above steps and your burner still won’t light, it may be time to call a professional. There could be issues with the gas tubes or other components that require expert attention.


1 comment
Muchas gracias. ?Como puedo iniciar sesion?